Desktop
Although having a pretty image on your desktop is great to look at, for me it was't functional so I went an hunted for images that would organised my desktop. I am a visual learner and found it frustrating trying to find files on my desktop.
Desktop Organiser Wallpaper:
More desktop organisers
Use your Google Calendar as your desktop wallpaper
Desktop organisation and how to customise your own
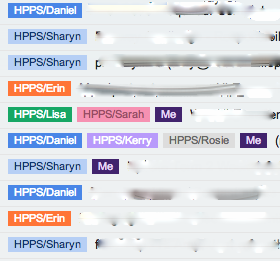
Inbox: Gmail
Making my inbox work for me rather than me working when I use my inbox has given me time back.
Although this took a while to set-up (I had thousands of emails to label and archive), it was well worth the effort and now runs smoothly.
Labs, Apps & Extensions
Here are some apps & extensions I can't live without:
If you haven't explored the labs under the settings in your Gmail, this would be my first stop. Have a read and enable the ones you want.
Undo Send: get up to 30 seconds to undo a sent email. Once this is enabled, you can go to your general settings and determine the send cancellation period (up to 30 seconds).
Extensions:
Streak: This is a customer relationship management tool but has a function that allows you to see if people have read your emails and how many times an email has been viewed. You can also schedule when you want emails to go out.
Chrome Apps & Extensions:
Undo Close Tab: accidentally closed a tab? Use this extension to easily access closed tabs.
Buffer: great way to share content on social media, you can also analyse the content you are posting to see how many people it is reaching. Use the Buffer extension straight from your browser to send content to Buffer.
Pin It: pin straight to Pinterest
Word Cloud: Fan of Wordle? Summarise and share content of any website (either part or whole) in a word cloud.
QR Code Extension: using QR codes a bit, it's great having an extension that with a click of a button will generate the code.
OneFeed: This brings all your social media and news feeds to one place. Customisable news feeds are great for following blogs, etc, but I often forget to go and check them. With this extension, when you open up a new tab, instead of the default page being say google.com, it is now your news feed. Customise it by editing the sources to follow your favourite blogs, blogs from your school or any other news source with either searching their data base or using the RSS feed URL (RSS Feed extension).
Presenting Zoom (Mac Only):
I can't live without this feature on my MAC being enabled. It allows me to zoom in on part of my screen. Great for when I am teaching students, especially when they ask questions like "where is that button"or you just want them to focus on part of a webpage. It is also great for giving presentations and you need to zoom in to demonstrate something.
In your settings, head to accessibility
Then enable these functions:
Now when you hold down control and use 2 fingers to scroll, the screen will zoom in and out where the cursor is (you can change the particular settings to suit your usage). This takes a little while to get used to, but well worth using.
Customise Icon
You can use your own images or images from the internet. Download the image, open it in preview. Then copy (command-c) this image. Right click (or the equivalent) on the folder you would like to change the image of, from the menu that appears, select get info. Click on the small icon at the top left of the folder's Get Info window, and press command-V to paste in the image that you copied from the preview image. The image should change in both the window and where you folder is.


No comments:
Post a Comment